Lion House Rolls
November 19, 2012 § 4 Comments
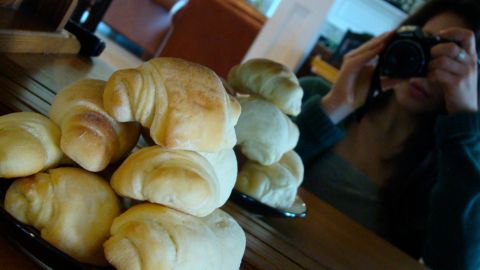
A love affair? Maybe, but I guess I justify it since it only happens once a year. And, like me, you won’t believe you made these pudgy little suckers, nor will your guests. Yes, I know, bread is not exactly nourishing, but smothered with ghee or creamy butter, it sure is a perfect indulgence once and a while (i.e. once a year at Thanksgiving). Lion House rolls are heaven. This is not my recipe but I’ve adopted it, made them the last three years and I must say, if every family chef made these buttery babies, we’d never have to rely on Pillsberry for pokable perfection ever again.
If you’re a visual learner, watch this Lion House video and get to swingin’ your dough!
In the large bowl of an electric mixer, combine the water and the dry milk, stirring until everything is dissolved. Add the yeast to the mixture while milk mixture is still warm. Proof the yeast (let it dissolve and start to react before adding anything else) for a couple of minutes then add the sugar, salt, butter, egg and only 2 cups of the flour.
Mix on low speed until ingredients are wet and shaggy; turn to medium speed and mix for 2 minutes. Stop the mixer and add 2 more cups of flour (total of 4 cups added at this point). Mix on low speed until the ingredients are wet, then turn mixer on medium speed and mix for 2 minutes.
At this point, the dough will be stiff. Remove the bowl from the mixer and knead in the remaining flour by hand.
Add approximately 1/2- 1 cup of flour and knead. The dough should be soft, not overly sticky, and not stiff. Note: It’s not necessary to use the all of the 5 1/2 cups of flour.
Scrape the dough off the sides of the bowl. Coat the sides of the bowl with 1 tablespoon of extra virgin olive oil. Turn the dough over, keeping it in the bowl, so it is covered with the oil. Coating the dough with oil ensures moisture won’t escape. Cover the bowl with a small towel and allow it to rise in a warm place until it has doubled in size.
You want to cut the rectangle into smaller rectangles that are 2″ by 4″. If you make and “L” with your thumb and pointer finger, as it shows in the video, that will yield the right width and height to cut the rectangles.
Roll or flip them (like in the video) and place them on greased baking pans with the end of the roll resting on the pan. Cover with a towel so they don’t dry out as they rise. Let them rise until they double in size; this usually takes about an hour to an hour and a half (in a warm kitchen).
When they’ve risen, bake at 375 degree Fahrenheit for 15 to 20 minutes, or until they’re golden brown. Serve immediately. Leftovers (although there probably won’t be any) can be frozen- they make a great base for bread pudding!
Sugar Pumpkin “Hummus”
October 6, 2012 § 2 Comments
This is going to be quick; no convincing, no nutrition information or wordy phrases (sorry Paul) and it’s mainly because every second spent doing something other than studying alpha helices, beta-pleated sheets and amino acids seems kind of, I don’t know, unproductive. BUT we all have to eat so I might as well share one of my recent favorites.
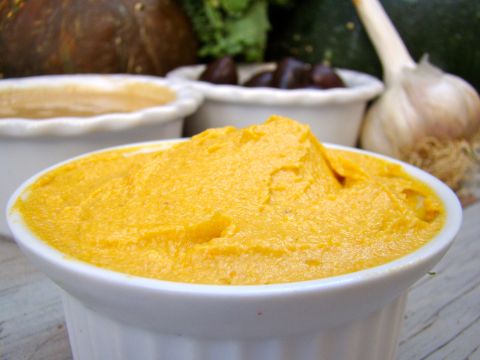
I know, why didn’t we think of this before? Anyways, this can be used as a dip, a spread, a body mousse or a dressing and, can be made with other fleshy winter squash, nut/seed butters and spices. With that said, this lightly spiced pumpkin-tahina combo has been my favorite thus far.
I do have to mention that a creamy tahina (also know as tahini but I have had trouble calling it that since hearing Israelis throatily proclaim it tah-hina as if it’s a goddness of some sort) and pungent garlic are necessary here (since they are really the only ingredients). Cumin, sumac, nutmeg, black pepper, paprika or a touch of cayenne would certainly lend some character, but here is the base, you do the rest. Also, I will give the recipe for homemade tahina, which is by far the strongest and most satisfying, but you can certainly fine some decent tahina around.
Oh by the way, I was joking about the body mousse thing…
Sugar Pumpkin “Hummus”
Hummus: 2 cups of sugar pumpkin puree*, 1/3 cup tahina, 2 cloves raw garlic, about 2 Tbsp extra virgin olive oil and fine grain sea salt to taste.
*Roast a large, gutted pumpkin at 375 degrees Fahrenheit for 45 minutes or until soft then scape out the flesh. In a food processor, or blender pulse the pumpkin until sooth. 15oz of organic canned pumpkin works as well.
Tahina: 2 cups hulled sesame seeds, 1/3 cup extra virgin olive oil or sesame seed oil and 1/4 tsp sea salt (or more to taste)
In a skillet, toast the sesame seeds one cup at a time until light brown and fragrant. In a food processor pulse the toasted seeds until they form a fine meal. Add the salt. While running the food processor, add olive oil in a stream, processing for about 15 seconds. Pour the tahina into a bowl and mix with a fork until there are no dry lumps. Taste and season with more salt if necessary.
Note: Freshly milled tahina can be stored in a mason/bell jar in the refrigerator for approximately 2 weeks.
In a bowl combine the pumpkin puree, tahina and olive oil. Mix until fully combine. Press (with a garlic press) or chop the garlic then add it to the pumpkin mixture. Mix well, and season with salt or desired spices. Refrigerate until ready to serve.
This recipe makes about 4 servings. It can be kept refrigerated in an airtight container for 4 days, but I guarantee it won’t last that long.
Sprouted Buckwheat & Date Granola
August 9, 2012 § 3 Comments
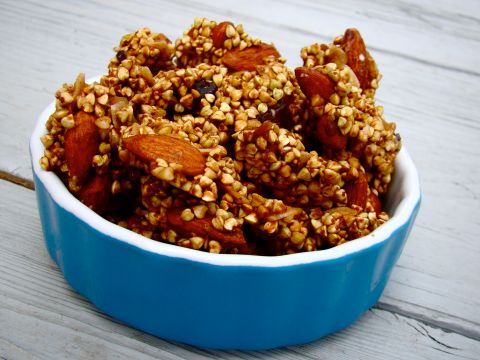
Crunchy granola. Yes, crunchy granola is right and in more ways than the one mind-blowing, muscle powering, tongue tantalizing way I’m about to share with you. This recipe basically defines crunchy granola in the flowing floral skirts, worn sliver jewlery, kombuch brewing, feathers and fern trees, Dr. Bronner’s castile soap, mung bean sprouting, beeswax boiling, make love not war, downward-facing dog kind of way. This buckwheat granola was my best friend during my mountain and rock climbing excursion through New Hampshire.
While we are on the topic; I Googled “crunchy granola” and was so amused (maybe a bit too much) by the Urban Dictionary definition of “crunchy granola bar” that I felt it completely necessary to share so you can use it to spice up your everyday vernacular.
Heidi: “Oh that Crunchy Granola Bar? I heard he just moved here from Denver.”
Hiking and rock climbing with two crunchy granola bars is not easy, so I made a huge batch of raw sprouted, vegan (if you omit the raw local honey) buckwheat granola and figured it would be the best fuel (screw over-processed power bars) to power my butt up the mountain as fast as my boyfriend and his friend. And I must say, it worked very well. Not only did we make it up Mount Washington, but we completed the ascent, which usually takes about 4 hours, in only 2 hours and 40 minutes (including our granola eating breaks). I was impressed.
Since the “crunchy granola bars” I was hanging with both spend most of the year in the mountains of Arizona and Colorado, they are into rock climbing. Because Rumney, NH has some good spots to climb, we spent our last day there so they could remedy their climbing craving. So, for the first time I climbed outside, and have to say, it was a lot of fun – but again, without my sprouted granola I probably would not have been able to keep up and complete all the climbs that they did!

After leading the climb so I could top rope, Shann decided try a route that was unconventional before he cleaned the route.
Between climbs I came across some pretty cool looking mushrooms but decided to stick with eating the granola. I don’t think hallucinating is smart while rock climbing but what do I know? Anyways, let’s talk about this granola. Buckwheat is a serious power food. Not only is it gluten-free, but it also, according to Journal of Agricultural and Food Chemistry, may help to lower blood glucose levels which allow those who enjoy it to stay satiated while managing and preventing diabetes. Plus, buckwheat is high in fiber, flavonoids and minerals such as magnesium. These mirconutirents harmonize to synergistically lower LDL (low density lipoproteins aka bad cholesterol) and increase HDL (high-density lipoproteins aka healthy cholesterol). Almost as impressive as our Mt. Washington ascent, huh?

This is a pretty common edible mushroom called Hen of the Woods or Maitake which is found on or near dilapidated oak trees.
Sprouted Buckwheat & Date Granola
3 1/2 cups raw buckwheat*, 25 large Medjool dates, 1 cup water, 2 Tbsp organic extra virgin coconut oil, 2 Tbsp raw honey (optional), 1 Tbsp organic vanilla extract, 1 tsp Himalayan pink salt, 2 Tbsp Ceylon Cinnamon, 2 cups whole raw nuts (almonds, pecans or cashews), 1 cup unsweetened coconut flakes
*the amount will increase after sprouting because the buckwheat will hold water
Optional Additions: Flax seeds (raw or sprouted), crystallized ginger, dried Turkish or Black Mission figs, dried bananas, seeds, cacao nibs or beans, etc.
To Sprout: Rinse the buckwheat in a sieve, then put it in a baking dish or bowl fully submerged in water. Let the buckwheat sit in the water for 1 hour. After an hour, pour the buckwheat back into the sieve and cover with plastic wrap. Let sit for 24-48 hours (depending on how sprouted you want them) rinsing every 12 hours. When you begin to see the “tails” you can make the granola.
Date Paste: In a blender, combine 18 dates, the water, coconut oil, honey (if using), vanilla and pink salt until they for a somewhat smooth paste. Taste and adjust adding more dates, honey or vanilla depending on your preferences.
Meanwhile, chop up the remaining dates into fourths. Mix dates, nuts, coconut and cinnamon into the sprouted buckwheat. Add the date paste making sure to scrape every last drop from the blender into the buckwheat mixture.
To “Dehydrate”: Set your oven to 125 degrees Fahrenheit. Line 2 baking sheets with parchment paper and lightly coat with coconut oil. Split the buckwheat mixture into two and evenly press it out on to the baking sheets. Dehydrate for 10 to 24 hours until the date paste is dry and the buckwheat forms sheets or clusters.
Note: My oven takes about 20 hours set on the “drying” setting, but every oven will be different depending on the setting and the heat. If you have a dehydrator, set to about 110 degrees Fahrenheit and dehydrate for 3-6 hours flipping the granola over after 1.5-3 hours.
Enjoy in yogurt, tossed into a kale salad (my favorite), with some fresh figs or berries, on a peanut butter banana, in nut milk or just straight up in big handfuls! Be careful though, this stuff is addicting…. and crunchy!
P.S. for more on sprouting check out this old post or this recipe.
Sweet Kale Breakfast Salad
July 16, 2012 § 2 Comments
It makes sense to eat what the garden gives you right? 
We are in the heat of the summer and finally the zucchinis are sprouting their phallic protrusions like it’s going out of style, the cucumber vines are spotted with petite yellow flowers that morph into miniature cucs, the nasturtiums are going wild, broccoli crowns royally spring up after every cutting, snap peas line the twirling tendrils, green tomatoes sun bathe trying to turn their sick skin ruby red, the chard is plentiful, garlic scapes emit their pungent fragrance and the kale isn’t stopping any time soon.
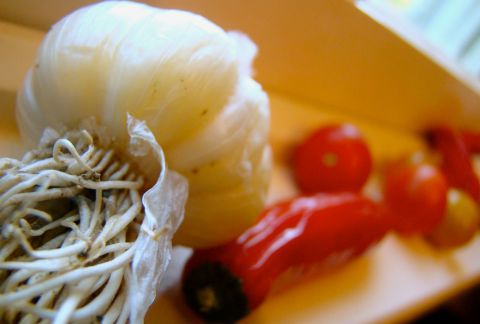
Russian Red garlic has purple cloves and deep flavor. This is an early bulb I pulled up last week – curiosity got the best of me. In the background are the first sungold cherry tomatoes of the season.
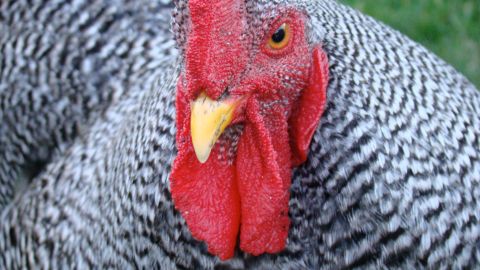
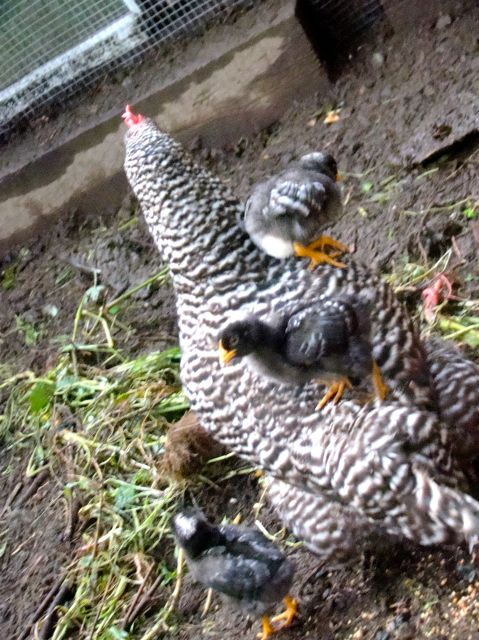
Along with the boisterous produce, eggs with yolks that are as orange as the sky at sunset are coming rapidly. The four chicks are growing faster than the purslane at the feet of my brandywines and I’m excited to figure out their sex. I’m hoping for no more than one rooster, but that would be some ridiculously good luck.
Good food is always plentiful in the summer as meals are always straight from the garden. It takes a lot to grow the food so to not take advantage of each morsel that comes from the rich soil seems silly. With that being said, I’m sure you can image how much chard and kale I’ve been eating, no? After eating greens for breakfast, lunch and dinner I guess it’s not surprising that I would start doing “crazy” things. First I started using nut butter to dress the leaves of the salad, next I added some fruit and then I went wild, mixing cacao nibs into my plate of Russian Red kale. Oh so good.
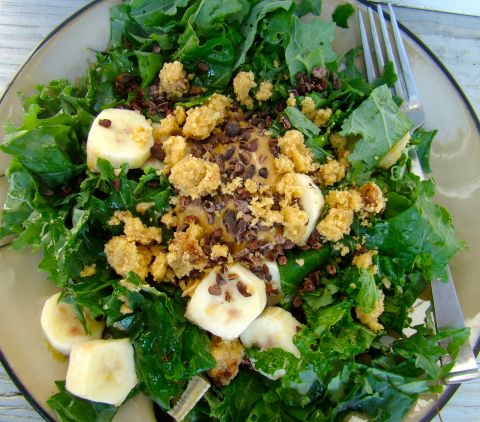
Not many greens can hold up well in a salad of this caliber, but kale is as hearty as it gets so experiment until you get the right proportions. Here I used organic peanut butter, a frozen banana and some homemade halva.
I guess it may seem strange if you’re stuck on the black and white idea that cacao = chocolate and chocolate = cacao but if you step out of the narrow-mindedness of typical associations, cacao is no more than a dried seed that belongs nestled between the chlorophylly leaves of your kale salad. Plus, cacao + kale = super food extravaganza. Together (2 cups kale and just one ounce of cacao nibs) they deliver over 1300% of the recommended vitamin K and over 300% of the needed vitamin A. Plus calcium, iron, manganese, magnesium, B vitamins, essential fatty acids, fiber and more flavonoids than almost any other super food (think blueberries, wine, green tea, etc).
If that is not enough, both kale and cacao contain a significant amount of the amino acid tryptophan, a precursor to serotonin. Serotonin, found mainly in the gastrointestinal tract of humans and animals is known to promote feelings of happiness and well being (ever wonder why chocolate is magical?). Now maybe you can see why it’s a good idea to start your day with cacao and kale, never mind just consume the stuff in general. Edible optimism.
This is not really a recipe per se, but more of a suggestion. I’ve used raspberries, blue berries, or strawberries and if it’s really hot I substitute half of a frozen (organic/fair trade) banana. Depending on the fruit I use I interchange peanut butter with almond butter but anything works. Also, I’ve been breaking up pieces of homemade halva into the salad to give it more nuttiness – it’s a nice addition and adds some extra calcium if you like halva. Toasted coconut or buckwheat granola also work really well with the flavor of kale. Remember, kale is bitter so taste as you go to make sure you like the flavor combinations.
Kale Salad
1 1/2-2 cups raw kale, chopped, 2 Tbsp nut butter, 1 1/2 Tbsp extra virgin olive oil, 1/2 cup fruit, 1/8 cup organic, raw cacao nibs or beans
Chop kale, toss it in 1/2 tbsp olive oil. Mix remaining olive oil with 1 tbsp of nut butter and mix with a fork until it’s homogenous. Pour the oil and nut butter mixture over the kale and toss. Add nibs and toss until mixed. Add fruit. Top with the remaining nut butter and a sprinkling of nibs.
Share and enjoy!
Avocado Gelato
May 9, 2012 § 1 Comment
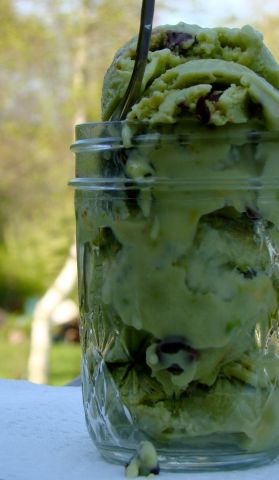
Creamy, suave, light & decadent… I’m not sure it can get much better than this. 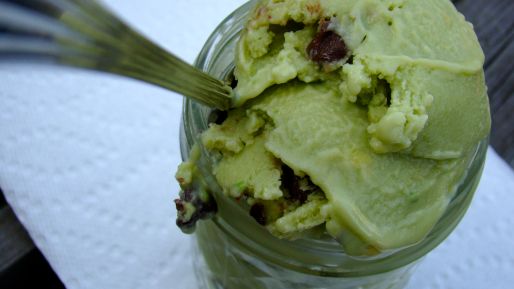
Yes. That’s exactly what you expected right? Step aside artificially colored mint chip; never mind the mind-blowing flavor, the attractive color will be a favorite as far as aesthetics go in no time. Plus, what’s ice cream without chocolate. Come to think of it, what’s dessert without chocolate, I mean really?
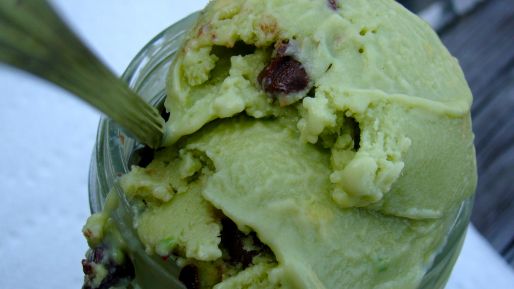
To get a bit more up-close and personal
Yum.
This recipe, with the personal addition of Oaxacan chocolate I brought home from Mexico, landed in my inbox last week as a Cinco de Mayo dish curtsey of Gourmet Magazine. The second I laid eyes on it, I knew I had to give it a shot and I’m happy to say I had some serious beginner’s luck (this was my first time churning up gelato). Unfortunately, you will need an ice cream maker for this recipe, but at this point I’m convinced the world would be a heck of a lot more peaceful if everyone had the pleasure of licking a cone of homemade ice cream (or gelato) whenever they desired.
Avocado Gelato
2 cups of organic whole milk, 3/4 cup granulated sugar, 2 large avocados, soft to touch, 2 Tbsp organic corn starch, 500mg tablet of vitamin C, crushed, 1 1/2 tsp pure vanilla, 1/4 cup chocolate (optional)
In a small sauce pan, bring1 ¾ cups milk, ½ cup sugar, and a pinch of salt to a simmer. Stir consistently to prevent milk from burning. Meanwhile, dissolve the cornstarch in ¼ cup cold milk and whisk into simmering milk. Bring the simmering milk mixture to a boil over medium heat, continuing to stir constantly. Boil for one minute. Pour the milk mixture into a metal bowl and chill down in an ice bath, or in the freezer until cool to touch.
While cooling the milk, purée the flesh of the avocados with ¼ cup sugar and the crushed vitamin C tablet. Refrigerate the avocado purée until the milk mixture has been chilled. Mix the chilled milk mixture he avocado purée and add vanilla. Freeze in an ice-cream maker. If you choose to add anything (i.e. chocolate, macadamia nuts, coconut, etc) add at the last 5 minutes of churning.
Remember to keep all of the ingredients COLD before adding them to the ice cream machine.
Enjoy!

